

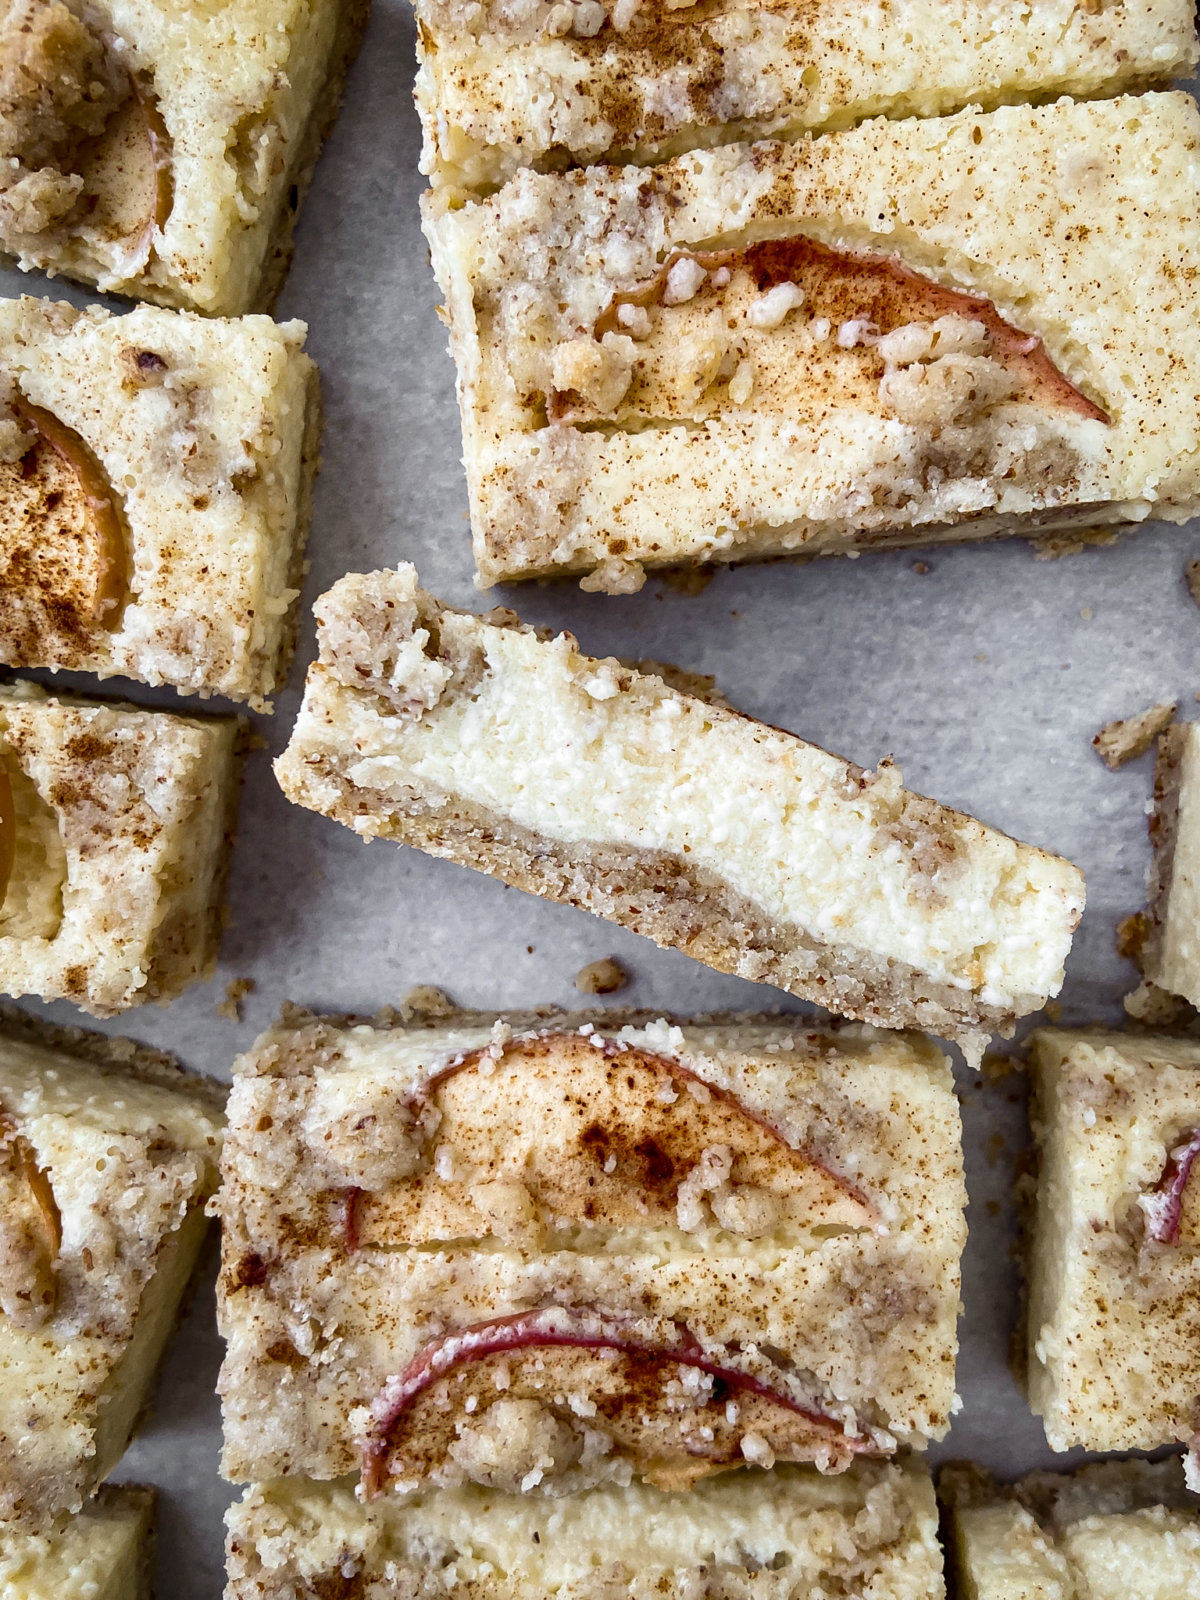


Nothing beats the combination of creamy cheesecake filling and delicious cinnamon spiced apples! These Dairy Free Apple Crumble Cheesecake Bars are a classic twist on an apple pie cheesecake with an allergy friendly spin using gluten-free flour for the crust and a dairy free filling! The center features a smooth cream cheese filling with a decadent hint of vanilla finished with a hearty crumble. What isn’t to love?
The Gluten Free Crust
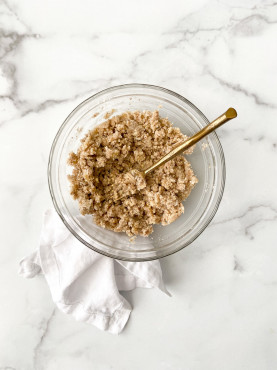
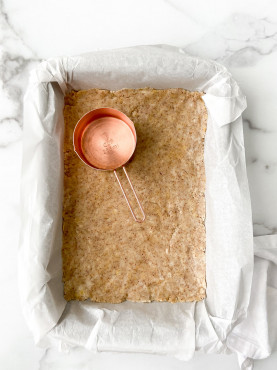
The crust alone is satisfying enough and can be used in countless recipes. It serves as the sturdy foundation for any filling. For this Dairy Free Apple Crumble Cheesecake Bar recipe I use a combination of flours. I use gluten free flour and almond flour. Why? When the two baked together they naturally create a depth of texture that is “crumbly” from the almond flour and solid from the gluten free Cup4Cup flour I recommend. Grab the same flours I use on Amazon so you never run out! You can use just the flour and take out the almond flour if you don’t have any on hand. Just be sure to double check you did a 1:1 ratio substitution! To help create one smooth crust layer is to use the bottom of a measuring up or a glass to help pack it in and even it out.
Crust To Crumble Topping
You will notice that I reserve 1/2 cup of the crust for the topping. I do this because there is enough from the base crust to crumble over the top without making another batch. However, I like a thick crumble topping so I add more ingredients to the 1/2 cup reserve to sprinkle on top of the apple cheesecake filling before I slide the pan into the oven. If you are short on ingredients, no worries! Evenly distribute the reserve crumble on top for a layer of texture. Want more? I have the additional crumble option in the recipe! I try to stay as flexible as I can when I am in a pinch but want to serve something sinfully delicious. Want more? Dive into my arsenal of treats here!
My Dairy Free Cheesecake Layer
I can’t pick which is the best part. The crust, the velvety cheesecake center, the baked apples, or the crumble! Good thing these bars have it all! The dairy free cheesecake layer is a show stopper in my Dairy Free Apple Crumble Cheesecake Bar recipe because of the magic when you mix together the listed ingredients below. It might seem like a lot but dairy free has been difficult to accomplish in recipes in the past, I know I have changed that! Note that when trying to substitute or leave out certain ingredients, you may not end up with the same results. For the coconut cream, it is usually in the international aisle of your grocery store in the Asian section. It is not cream of coconut or anything labeled other than coconut cream. When you open the can at home, be sure to give it a stir!
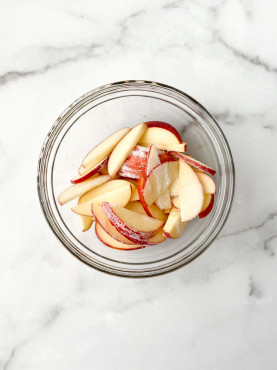
The Apples
Granny Smith apples are standard in baking. The reason why is because they are firm, tart and they hold their shape well. On the contrary, so do Gala and Fuji yet they are on the sweeter side. You can use what you like and each time you make this recipe try something different! I can promise you my Dairy Free Apple Crumble Cheesecake Bars will become a Fall staple in your home!


These bars are delicious as a snack alongside some coffee, dessert or even as an on-the-go breakfast bar! I guarantee it’ll keep your house smelling delicious as the apples bake in the oven. If you happen to take the family apple picking this fall, use all the extra apples to create this recipe! I guarantee you’ll be baking up some sweet fall memories for the kids for a lifetime.
If you’re baking these next couple of months and want to stay flexible, one of my favorite flours is the Cup4Cup all-purpose gluten-free flour because you don’t need to figure out conversion rates—simply swap one cup of regular flour for one cup of the Cup4Cup flour.
Dairy Free Apple Crumble Cheesecake Bars
Ingredients
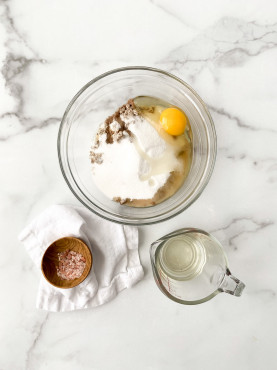
Crust
- 1 cup all purpose gluten-free flour
- 1/2 cup almond flour
- 1/2 cup granulated sugar
- 1/3 cup coconut oil melted
- 1 large egg
- 1 teaspoon vanilla extract
- pinch salt
Cheesecake Filling
- 2 packs Toffuti Creamcheese 16 ounces
- 2/3 cup granulated sugar
- 1/2 tablespoon lemon juice
- 1 teaspoon vanilla extract
- 3 large eggs
- 2/3 cup coconut cream
- 2 tablespoon gluten-free flour
- pinch salt
Apples
- 2 granny smith apples or other peeled, sliced thinly
- 1/4 cup granulated sugar
- 2 teaspoon ground cinnamon
For Extra Topping
- 1/2 cup reserved crust dough
- 1/2 cup coconut oil melted
- 1 cup all purpose gluten free flour
- 1/2 cup granulated sugar
- 1/2 teaspoon ground cinnamon
- pinch salt
Instructions
-
Preheat the oven to 350°F. Line the bottom of a 9 by 13 inch pan with parchment paper, keeping sides longer to allow for easy removal of bars later. Spray sides of pan with oil spray.
-
Make the crust: mix all crust ingredients together using a fork. Use your hands to form the dough. Reserve ½ cup of the crust to be used for the topping. Press dough into the bottom of pan and set aside.
-
Make the filling: In the bowl of an electric mixer, combine the cream cheese, sugar, lemon juice, vanilla, and lemon zest. Cream together. Stop the mixer, scrape down the sides and bottom of the bowl and beaters. Continue mixing until well blended.
-
Add the eggs one at a time, beating well after each addition. Add the coconut cream and beat for one full minute.
-
Stir in the flour, mixing until just incorporated.
-
Pour the filling over the crust.
-
For apples: in a small bowl, toss apples with cinnamon and sugar. Then layer the apples over the filling to cover fully. Add your reserve crust over the top if not making more in the next step.
-
For the extra topping: Using the same bowl as the apples (its fine if there’s sugar remnants), mix the reserved crust crumble with the oil, flour, cinnamon, sugar and salt. Crumble the topping over apples.
-
Bake for approximately 45 minutes to 1 hour, or until the top has browned slightly and the cheesecake is not too jiggly!
-
Cool completely, then refrigerate for at least 12 hours before slicing. The easiest way to slice is to remove the cake from the pan and then cut into squares. Serve immediately or pack in an airtight container and freeze for later.

