

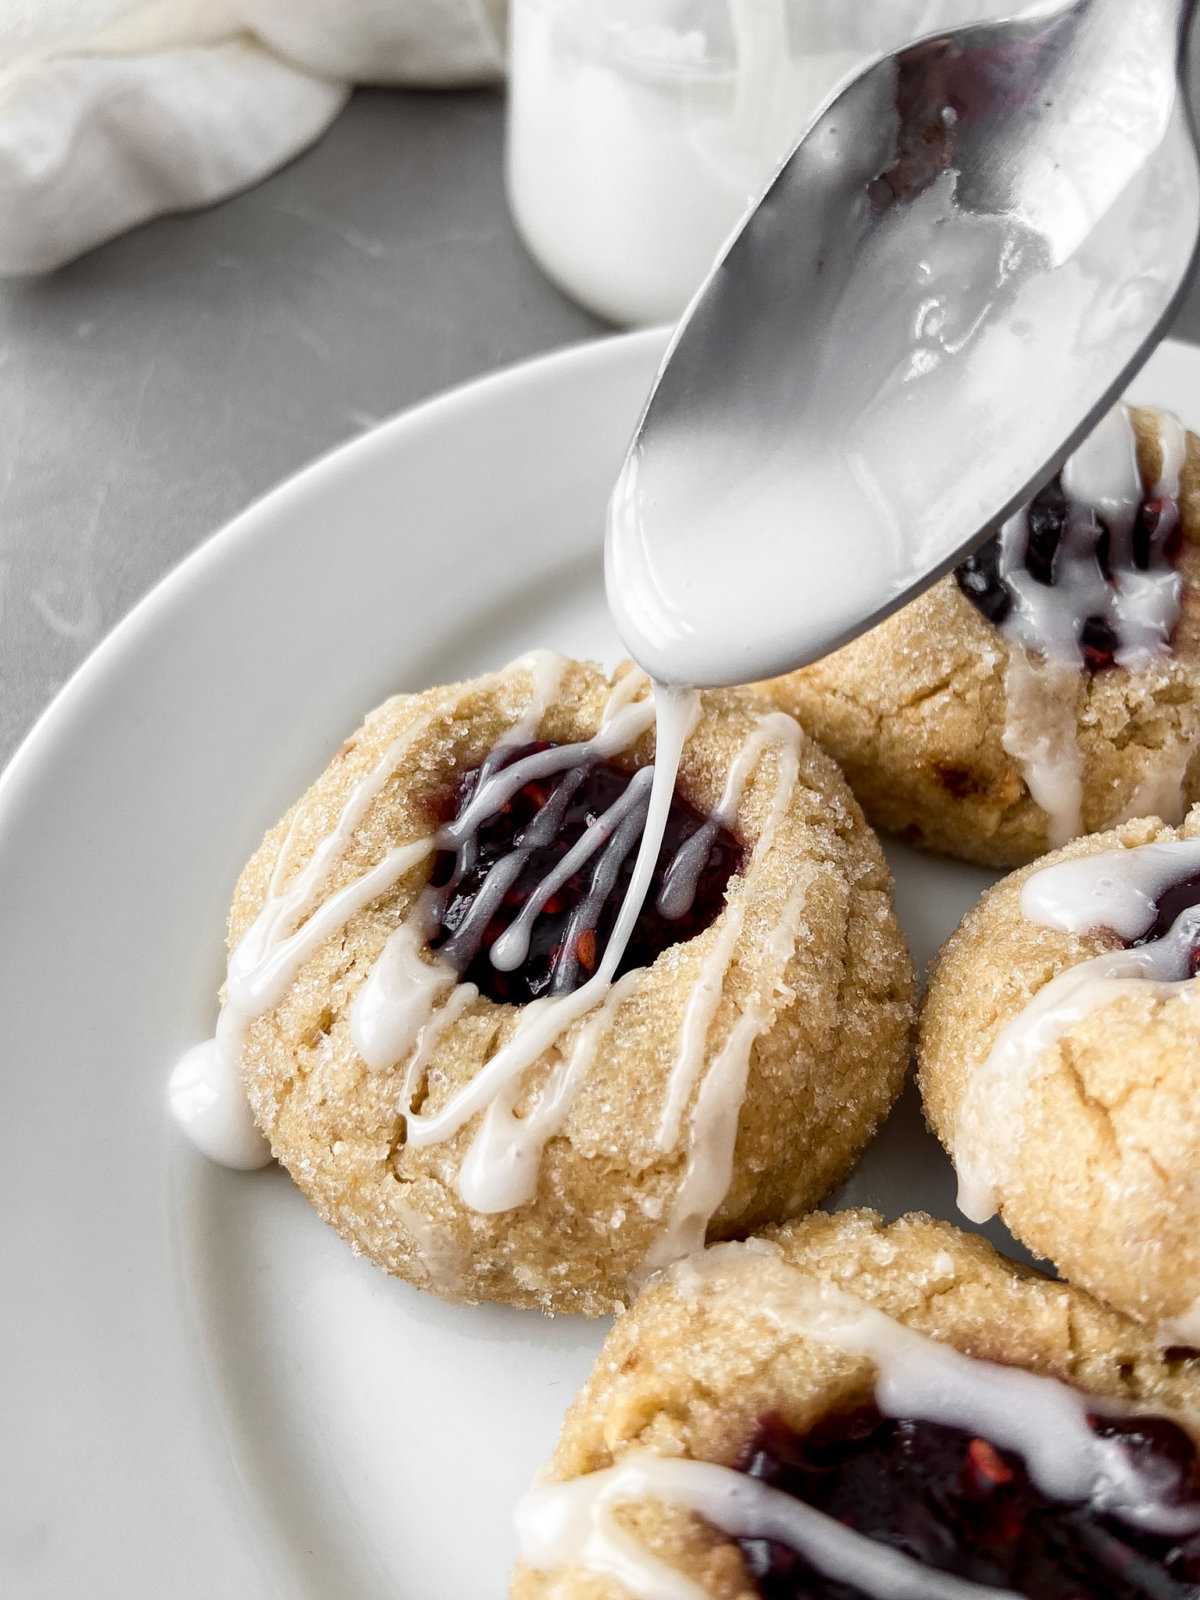


Oh for the love of cookies! When my kids were younger we used to dedicate a whole pre-holiday afternoon to baking cookies. We’d play some uplifting tunes and spend quality time together in the kitchen and I’d teach them how to precisely measure the flour and crack the eggs, and then I’d let them roll their own batch. Oh, how I miss those moments. These days my kids are so busy that I just bake the cookies and they devour them! These cashew thumbprint cookies with raspberry jam are the ultimate ‘devourable’ sweet treat. The buttery and nutty cookie perfectly complements both the sweetness and tartness of the jam, making these a delicious addition to your holiday dessert round-up. Serve them on a beautiful platter with fresh fruit and some dark chocolate for a simple and beautiful presentation. My cashew thumbprint cookies with raspberry jam and glaze will be the tastiest part of your holiday season!
Cashews Or Other Nuts
Cashews naturally have a sweet flavor to them, and the nutty flavor is mild compared to a pecan or peanut. However, this thumbprint cookie recipe is flexible so feel free to use whatever nuts you have on hand. If you are nut free, completely omit the nuts, stick to the basic dough recipe and add some flax seeds for texture. Flax seeds will add a similar nutty crunch and also offer a bonus fiber boost! The recipe makes about two dozen cookies which is also perfect for gifting your neighbors or friends.
Host a cookie swap party and let everyone drool over these baked goodies! Jazz up a glaze with all-spice or a boozy blast of bourbon.

Make Your Mark
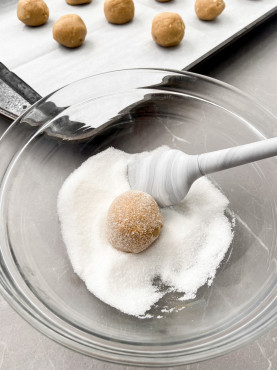
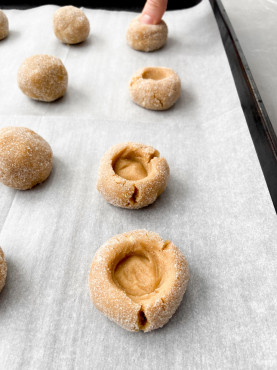
Once you mix all of your ingredients to create the dough, roll a small amount into a little ball, and then roll that into some sugar. Now you can use your thumb (hence the name: thumbprint cookie!) to make a dip (be careful not to go all the way through to create a hole) in the center for your raspberry jam. This is super fun and simple, so if you do have children who like to get involved, they’ll enjoy this bit. Just make sure you both wash your hands very well or wear gloves!

Jam Selection
This is where you can get as creative as you like! Traditionally, this recipe call for jam at the center but you can also fill the center with caramel, peanut butter, or nutella! I personally am partial to raspberry jam but use any flavored jam you are craving. Did you know you can make your own super simple jam too? Try this! Soak pitted dates in warm water for about an hour then process with fresh raspberries in a food processor until the mixture reaches a jam-like consistency. Use the reserved water from the soaked dates to help thin out the jam if needed. It’s a great way to add more natural sugar into your recipe!
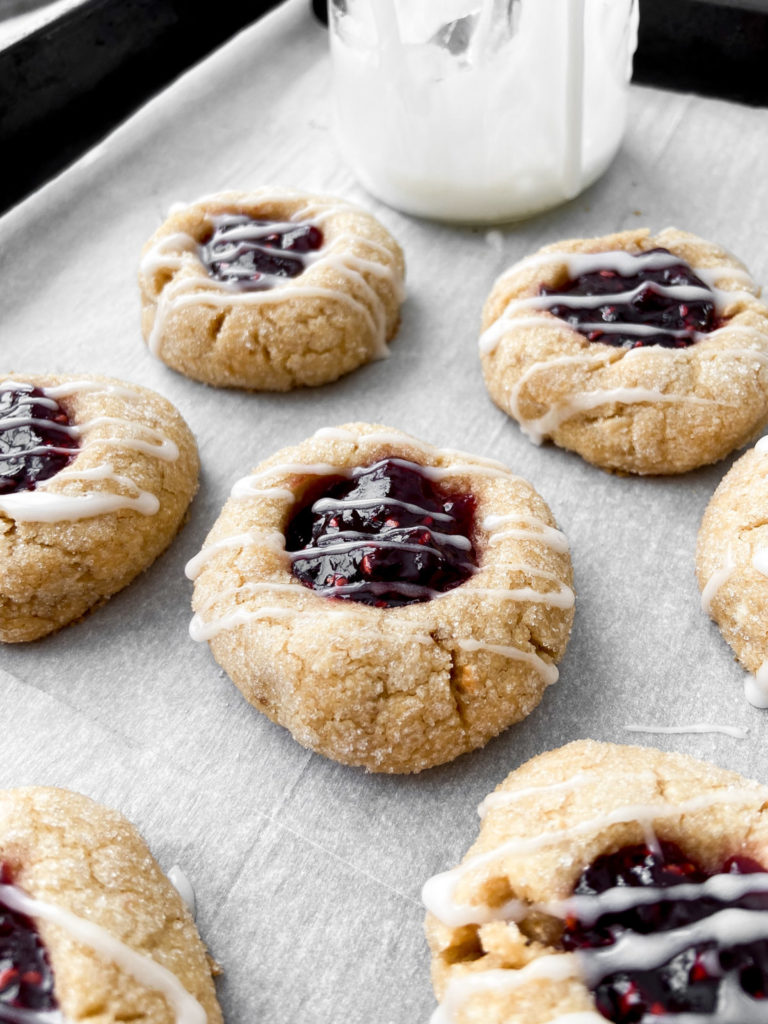
Present these cozy thumbprint cookies embellished with a simple glaze at your next holiday gathering!
For more holiday recipes like these cashew thumbprint cookies with raspberry jam and glaze, click here and stock up on all your pantry essentials for the season!
Pro tip: The best part of cookie baking is how wonderfully these thumbprints freeze. Consider making a batch in advance so that when the holidays roll around you can kick back and be present with the people that you love. Allow time for them to completely thaw before presenting them! Enjoy!
Cashew Thumbprint Cookies With Raspberry Jam And Glaze
Ingredients
- 1 cup unsalted butter
- ⅓ cup granulated sugar
- ⅓ cup dark brown sugar
- 1 large egg yolk
- Dash ground cinnamon
- 2 ¼ cup gluten free flour
- 2 teaspoons cornstarch
- ⅓ cup cashews finely chopped
- ⅓ cup granulated sugar for rolling
- ½ cup raspberry jam or your favorite jam
- ⅓ cup powdered sugar
- 1 tablespoon milk or water
Instructions
-
In a large bowl, beat butter, sugars, and yolk together. Add flour, cornstarch, and cinnamon, beat to combine. Fold in finely chopped cashews.
-
Pour 1/3 cup sugar into a small bowl, set aside.
-
Using a 1-inch cookie scoop, roll into a ball and place on a plate.
-
Roll each ball into your prepared sugar bowl to coat all sides. Place back on your plate. Repeat until all dough balls are covered in sugar.
-
Using a spoon or your thumb, make an indent in the center of each ball. Place in the refrigerator for 1 hour or freezer for 30 minutes.
-
Preheat your oven to 375°F. Line baking sheet with parchment paper. Set aside.
-
Place jam in a microwaveable bowl and heat for 20 seconds.
-
Remove chilled dough and scoop a small amount of heated jam into the center of each cookie. Bake 10 minutes.
-
Allow cookies to set on the baking sheet for about 3 minutes.
-
Mix together powdered sugar and milk, or water. Add more powdered sugar if your consistency is too thin or use more milk by a ¼ teaspoon if the consistency is too thick.
-
Drizzle over each cookie. Enjoy warm or room temperature.
-
Store in an airtight container for up to 1 week on the counter.

